Table of contents
- Introduction
- App Requirements
- Getting Started for Git Administrators
- Installation
- Managing License Key
- Working with SSH Keys
- Git URL Ports
- Setting Up Repositories
- Using the Auto-Connect Integration Wizard
- Connecting a Repository via Advanced Setup
- Adding a Repository Hosted on Windows Servers or Windows Network Share
- Tracked Folder and Special Integrations
- Managing Repository/Integration Configuration
- Repository/Integration Project Permissions
- Bulk Change
- Commit Email Notifications
- General Settings
- Web Linking
- Disabling Source and Commits Tabs
- Linking Git Commits to Jira Issues
- Smart Commits
- Repository Browser
- Viewing Commit Code Diffs
- Git User Identity
- Jira User Information Card
- Jira Issue Page
- Jira Project Page
- Jira Developer Panel
- Git Tags
- Reindexing
- JQL Searching
- Webhooks
- Jira Data Center (High Availability and Clustering)
- Localization
- Terms
- Licensing Notice
Documentation
Jira Developer Panel
This page applies to Jira Server, Jira Data Center and Jira Cloud.
Permissions
Jira Cloud - Development panel
The View Development Tools permission only applies to Jira Classic Projects. Next-Gen Projects don't allow to modify the permission.
Create Branches and Branch Names
For connected GitHub git host, this feature requires enabled public_repo scope permissions.
Commits Ahead and Behind
If the user does not have the View Development Tools project permission for the project, the developer panel will be unavailable for that user.
Getting Started
Git links are now available on the developer panel in the following screens:
- Issue page
- Search page in detailed view
- Jira Agile screen
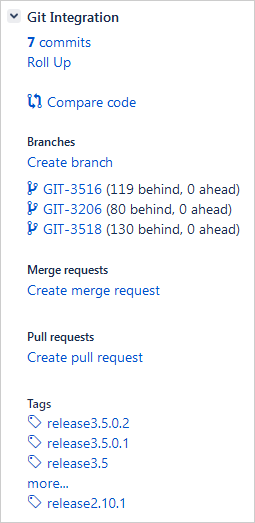
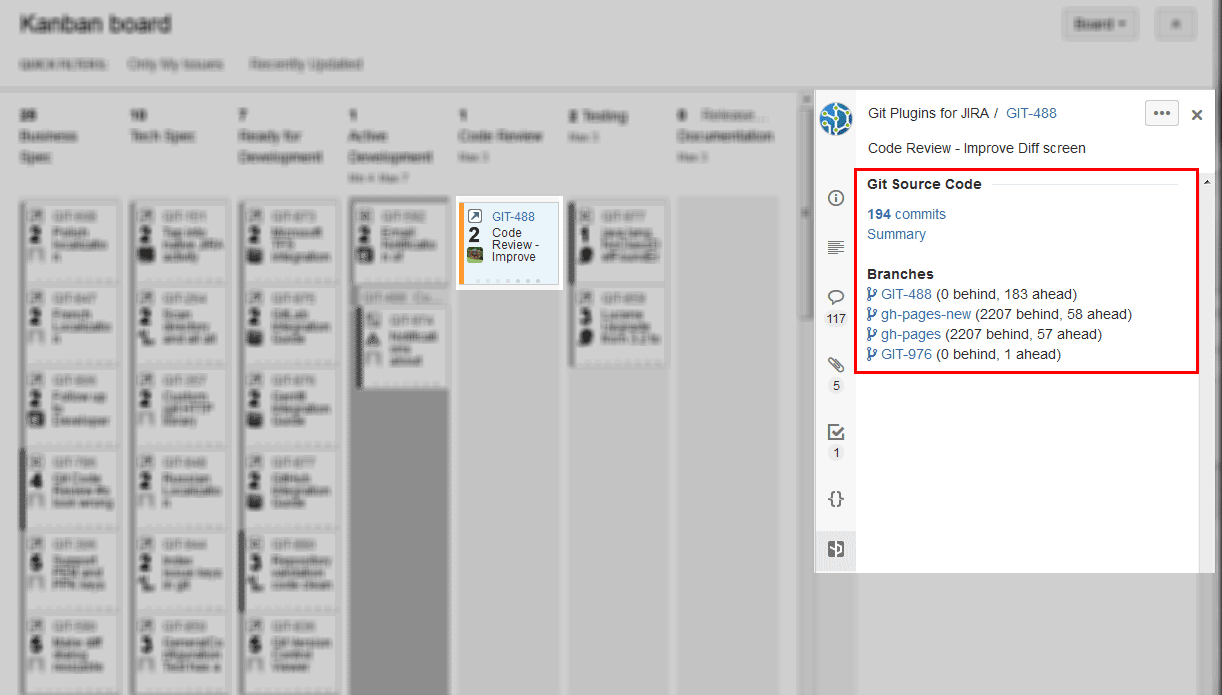
The 30 commits refers to an existing Git Commits view, which the issue tab have now. Clicking this text link will reload the page and automatically selects the Git Commits tab to view the commits.
The Roll Up refers to an existing Git Roll Up view, which the issue tab have now. Clicking this link will reload the page and automatically selects the Git Roll Up tab to view the git code summary.
JIRA SERVER ONLY: Click Compare code to compare code diff of different branches. It will open the following dialog:
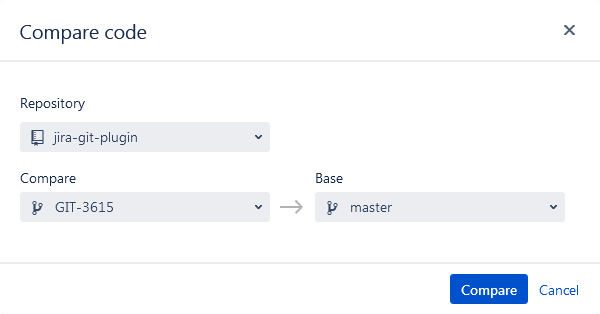
Select a Repository. Set Compare branch and Base branch then click Compare to proceed. The view redirects to the Repository browser Compare page showing changes between the compared branches.
Branches
The Branches section lists the branches names, linking the selected branch to view via the Repository Browser.
The branch is displayed on the developer panel and is also associated to the mentioned Jira issue by fulfilling one of the following conditions:
- The branch name contains the issue key. For example, TEST-1-fix-binaries.
- The branch has associated unmerged commits with the issue key in the comments. For example, TEST-1 fixed binaries.
The branch panel will show a summary of all the unmerged branches (regardless of the number of commits and the number of repositories) -- that either contain the name of the issue or have unmerged commits that reference the issue. This also gives users a view into the behind/ ahead status and provide links to the Repository Browser for those branch names.
Click Create Branch to create a branch for the selected repository. The following dialog is displayed:
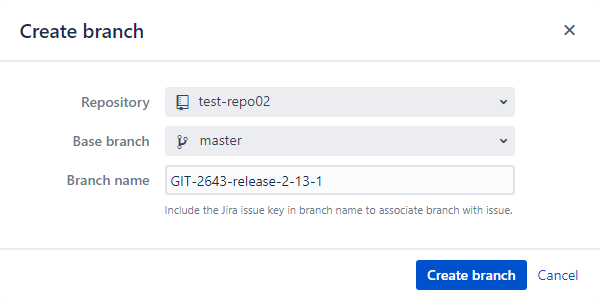
Select a Repository.
GITHUB If there are several repositories with the same name, the listed GitHub repositories will have their names attached with a GitHub organization name. For example, BigBrassBand/second-webhook-test-repo.
GITLAB If there are several repositories with the same name, the listed GitLab repositories will have their names attached with a GitLab owner name. For example, johnsmith/second-webhook-test-repo.
- Set Base branch and Branch name
- The Git for Jira app will populate the Branch name field according to the Branch Name Template declared in the Git Integration Options via General Settings. Enter a descriptive name or leave it as is (recommended).
If the Require User PAT option is enabled in the Integration Settings and a user PAT isn't configured yet for the selected repository via Repository Browser, the following dialog is displayed instead:

- Click the link label to setup the PAT. This will show the Repository Browser listing connected git repositories.
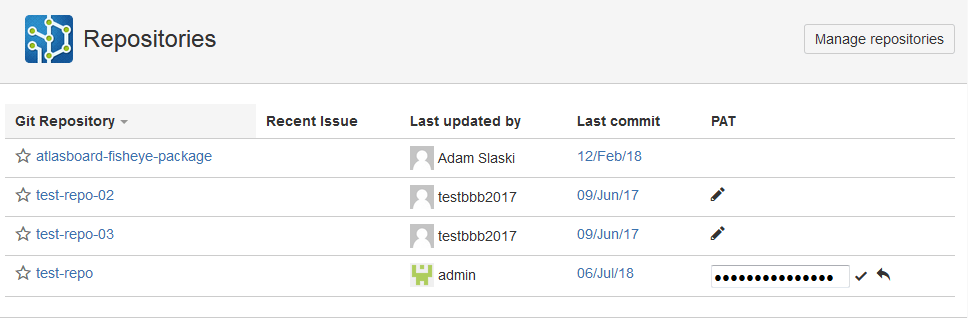
- Click the edit icon to setup a PAT for the selected repository. Paste a valid PAT of the current user to proceed. Invalid PATs will fail the branch creation process.
- Click check mark to use this PAT and save it to the current user profile. Click cancel icon to cancel setting up PAT for this repository.
- After the above steps have been taken, the users will be able to proceed with branch creation.
Click Create branch to proceed. The newly created branch is listed under the Branches section based on branch name. The index operation starts immediately after the branch is created.
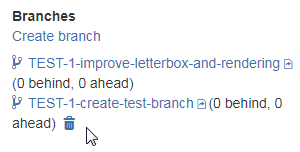
Hover the mouse pointer on the branch label to reveal the Delete icon. Click this icon to remove the created branch from the Branch list. This action will also delete it from the repository in which it was created.
This feature is available on connected GitLab* and GitHub** git hosts for Jira Server; GitLab, GitHub, Microsoft TFS/VSTS and AWS CodeCommit git hosts for Jira Cloud.
Git Integration for Jira Server/Cloud:
* v2.12.3
** v2.13.0
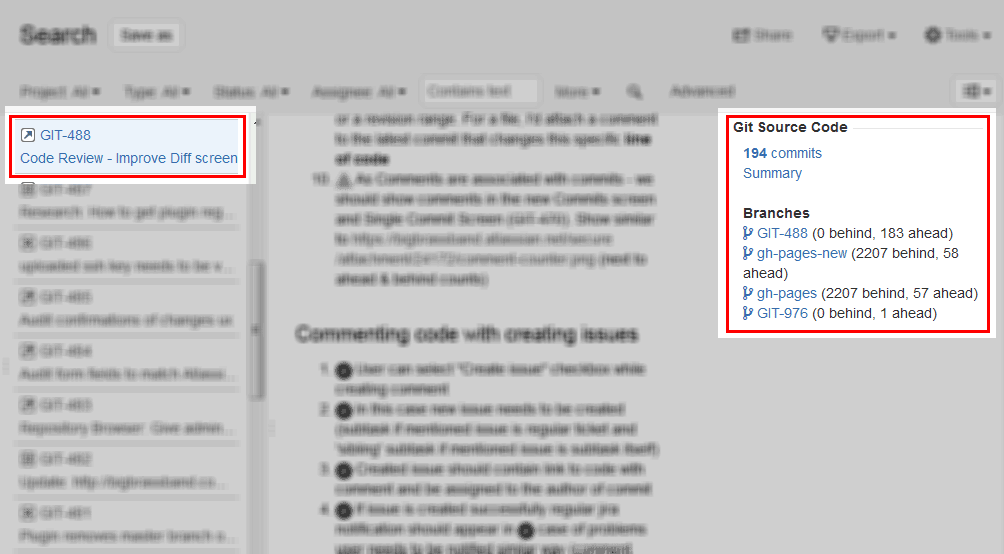
Commits Ahead and Behind
The numbers ahead and behind represent the number of commits that are ahead/behind the main branch:
- Ahead – number of commits in the branch which are not merged to the main branch.
- Behind – number of commits in the main branch which are not merged to the branch.
Clicking on the branch text links will open that issue in the Repository Browser. If Repository Browser is disabled for this repository, the text links will be inactive.
Pull Request/Merge Request
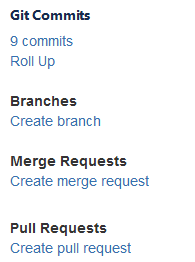
The Merge requests (if GitLab is connected) or Pull Requests (GitHub or other connected git hosts) section lists the merge/pull requests and their status. All merge/pull requests from all types of sources are shown here (for now, GitLab/GitHub/TFS/VSTS).
The displayed information depends on which supported git hosts are connected to Jira. For example:
- GitLab integrations only – merge requests
- GitHub integrations only – pull requests
- Both GitLab and GitHub integrations – separate sections for merge requests and pull requests
For necessary permissions that GitLab users must have for creating branches/merge requests, see GitLab Documentation: Permissions.
For example, if GitHub is connected to Jira, create a pull request by clicking Create merge request. The following dialog is displayed:
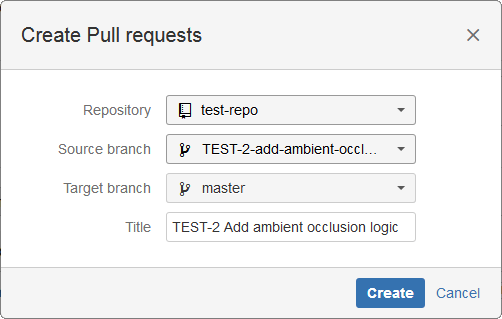
Select Repository from the list.
GITHUB If there are several repositories with the same name, the listed GitHub repositories will have their names attached with a GitHub organization name. For example, BigBrassBand/second-webhook-test-repo.
GITLAB If there are several repositories with the same name, the listed GitLab repositories will have their names attached with a GitLab owner name. For example, johnsmith/second-webhook-test-repo.
- Choose the newly-created branch as the Source branch.
- Set master as the Target branch.
- Enter a descriptive title or leave it as is (recommended).
If the Require User PAT option is enabled in Integration Settings and a user PAT isn't configured yet for the selected repository via Repository Browser, the dialog below is displayed instead:
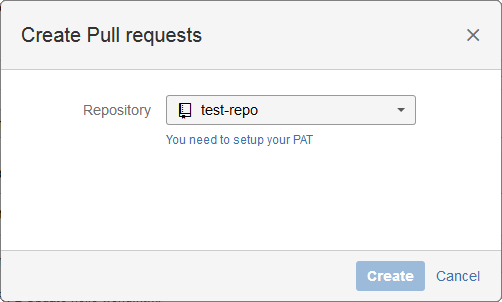
If an invalid PAT was configured for the selected repository, the pull request creation process will fail.
Click Create to create the pull request.
This feature is available on connected GitLab* and GitHub** git hosts for Jira Server; GitLab, GitHub, Microsoft TFS/VSTS and AWS CodeCommit git hosts for Jira Cloud.
Git Integration for Jira Server/Cloud:
* v2.12.3
** v2.13.0
If you want to create a pull request for GitHub, click Create pull request.
The merge/pull request is displayed on the developer panel and will also be associated to the mentioned Jira issue by fulfilling one of the following conditions:
- Merge/pull request Title contains the issue key. For example, TEST-1: Fix-binaries.
- Base Branch or Branch Name is assigned an actual name of an issue key. For example, TEST-1.
This will also allow a service user to associate a Merge/Pull Request with multiple Jira issues regardless of commit associations.
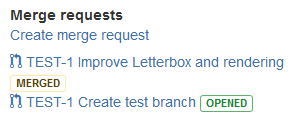
The Merge/Pull Request list provides status information about the merge/pull request if it is opened or merged. For example:
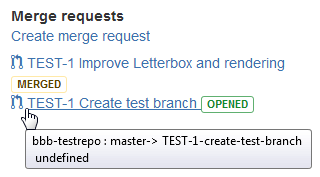
Hover the mouse pointer on the merge/request label to see information of the repository and branch it belongs to.
Issue and Search Pages
In Issue and Search pages, the developer panel is visible on the right pane.
Agile Screen
In Jira Agile screen, click on an issue on the board grid. Scroll down on the right pane to view the developer panel.